Triple Chocolate Layer Cake with Chocolate Ganache Drip
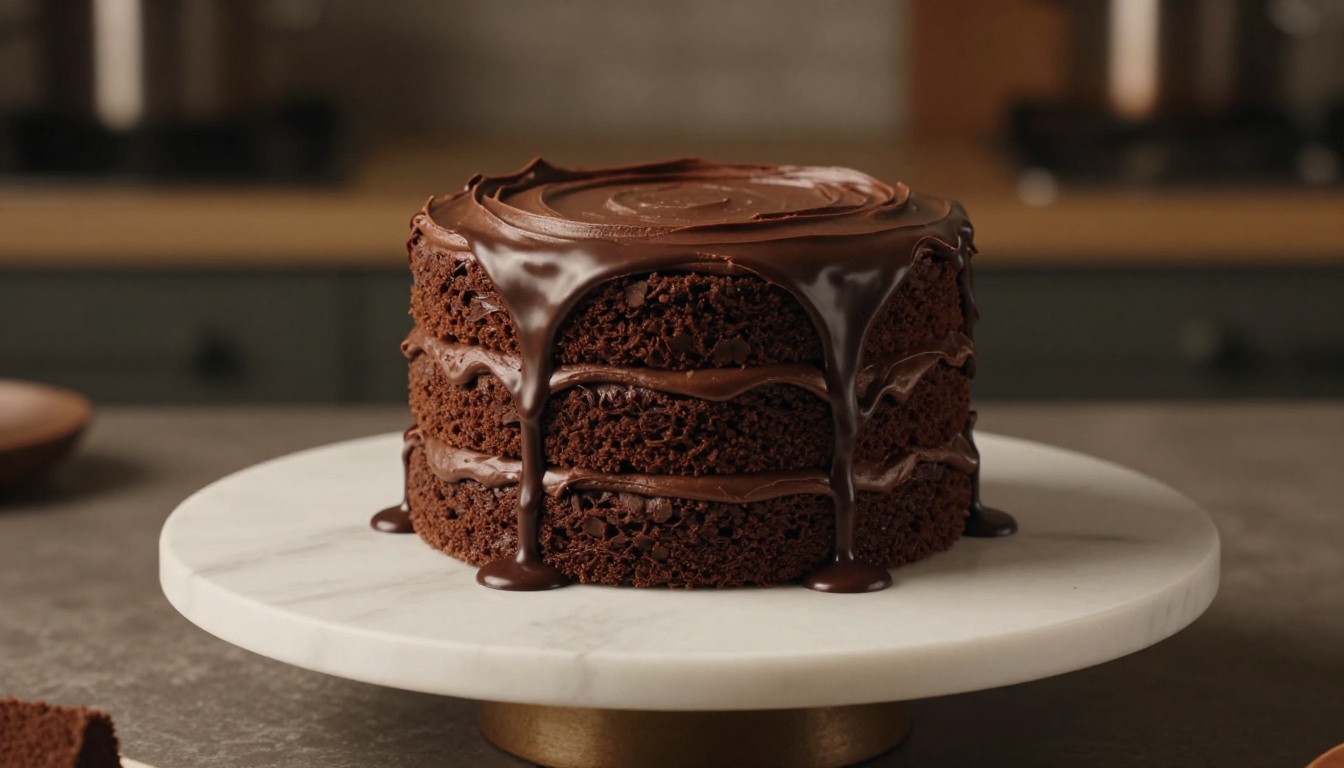
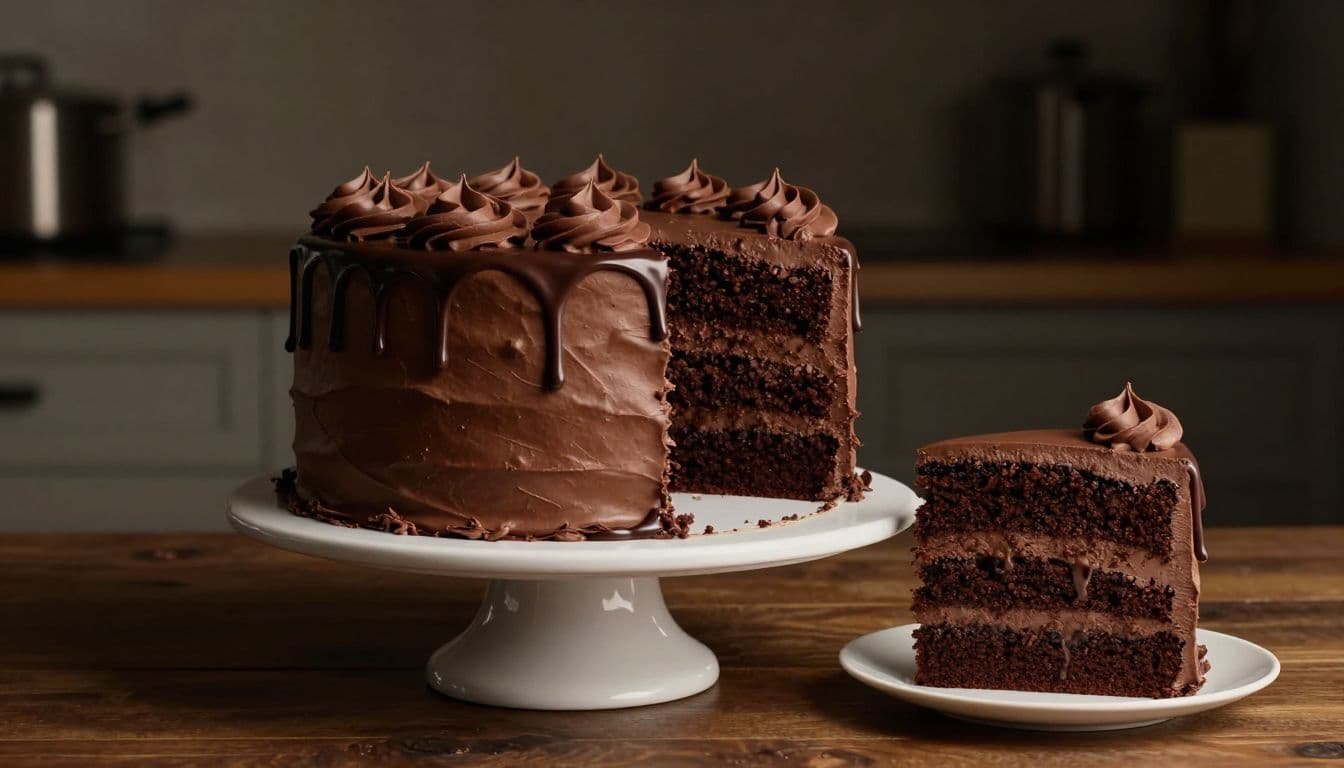
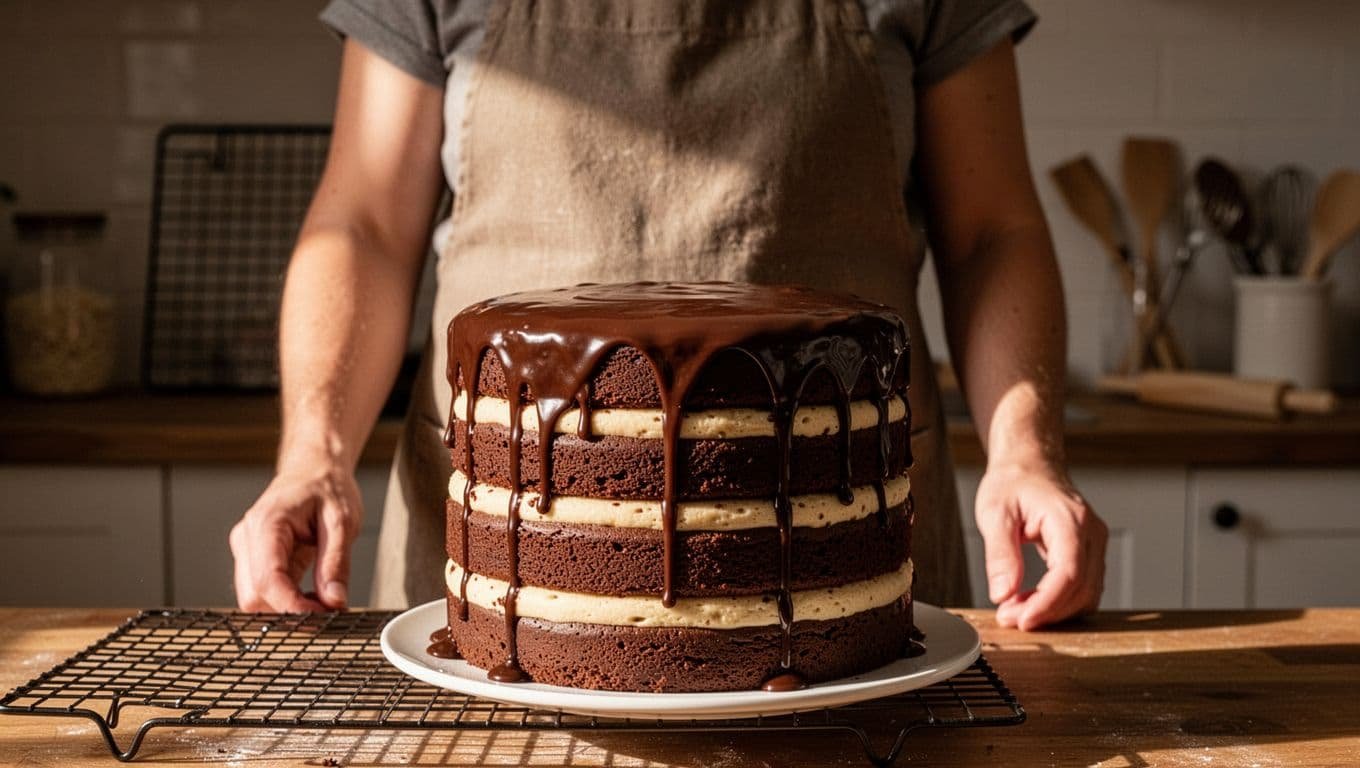
A tall Triple Chocolate Layer Cake brings together rich cocoa cake layers, creamy chocolate frosting, and a glossy chocolate ganache drip for a dessert that looks straight from a bakery window. Each slice is soft, fudgy, and finished with enough chocolate to satisfy serious chocolate lovers.
You don’t need professional decorating skills or hard-to-find ingredients to make it at home. This recipe uses clear steps to help you bake even layers, stack them neatly, spread smooth frosting, and create a polished ganache finish without the stress.
Next, you’ll see how to build the cake, prepare the frosting and ganache, decorate it beautifully, store it properly, and follow the complete recipe card for a celebration-worthy dessert.
Key Takeaways
- Bake moist, even chocolate cake layers, then cool them completely before stacking and frosting.
- Use smooth chocolate frosting between each layer for a rich, creamy center and stable structure.
- Chill the assembled cake before adding ganache so the drips stay controlled and attractive.
- Aim for ganache that is warm and fluid, not hot. A temperature near 90°F usually gives the best drip control, as explained in this chocolate ganache guide.
- Refrigerate the finished cake until serving, then slice with a warm, sharp knife for clean layers.
Triple Chocolate Layer Cake: What Makes Every Bite So Rich
The richness comes from three chocolate elements working together: moist cocoa cake layers, creamy chocolate buttercream, and a glossy ganache drip or chocolate garnish. Each one adds a different texture, so the finished slice tastes full without feeling one-note.
The Ingredients That Build Deep Chocolate Flavor
- Unsweetened cocoa powder gives the cake its concentrated chocolate taste and dark color. Unlike melted chocolate, cocoa powder adds chocolate solids with very little fat, while melted chocolate contributes both cocoa solids and cocoa butter, creating a denser, silkier texture.
- All-purpose flour gives the layers structure. Spoon it into a dry measuring cup and level it with a straight edge, or weigh it for better accuracy. Packed flour can make the cake dry.
- Sugar sweetens the batter and helps keep the crumb soft. Eggs bind the ingredients and add richness.
- Oil or butter contributes moisture and flavor. Oil often makes chocolate cake especially tender, while butter adds a fuller dairy taste.
- Buttermilk or sour cream adds moisture and gentle tang. Their acidity also works with baking soda to help create a tender crumb, as shown in this buttermilk chocolate cake explanation.
- Vanilla and salt sharpen the chocolate flavor, while baking powder and baking soda help the layers rise.
- Hot coffee or water loosens the batter and blooms the cocoa. Coffee can make chocolate taste fuller without making the cake taste like coffee.
Room-temperature eggs, dairy, and butter blend more evenly, which helps create a smooth batter and consistent texture.
Choosing the Right Pans for Tall, Even Layers
Use three 6-inch round pans for a tall, celebration-style cake, or two 8-inch pans for wider layers and more servings. Grease each pan, line the bottom with parchment, then dust the sides with cocoa powder to reduce sticking without leaving white flour marks.
Pan size changes baking time, so begin checking early. A toothpick should emerge with a few moist crumbs. Let the cakes cool briefly in their pans, then transfer them to a rack to finish cooling before frosting.
How to Bake Moist Chocolate Cake Layers Without Dry Edges
Moist chocolate cake starts with gentle mixing, accurate portioning, and steady oven heat. Prepare the pans first, then keep the batter moving quickly once the hot liquid goes in.
Mix the Batter Gently for a Soft, Tender Crumb
Whisk the flour, cocoa powder, sugar, leaveners, and salt in one large bowl. In a second bowl, combine the eggs, oil, buttermilk, and vanilla, then pour the wet mixture into the dry ingredients. Stir until the flour almost disappears before adding hot coffee or water. The batter may suddenly look thin, but that loose texture helps create a soft, moist crumb.
Use a whisk or spatula to mix only until no dry streaks remain. Scrape the bottom and sides of the bowl once, then stop. Too much stirring develops gluten and can make the layers dense instead of tender.
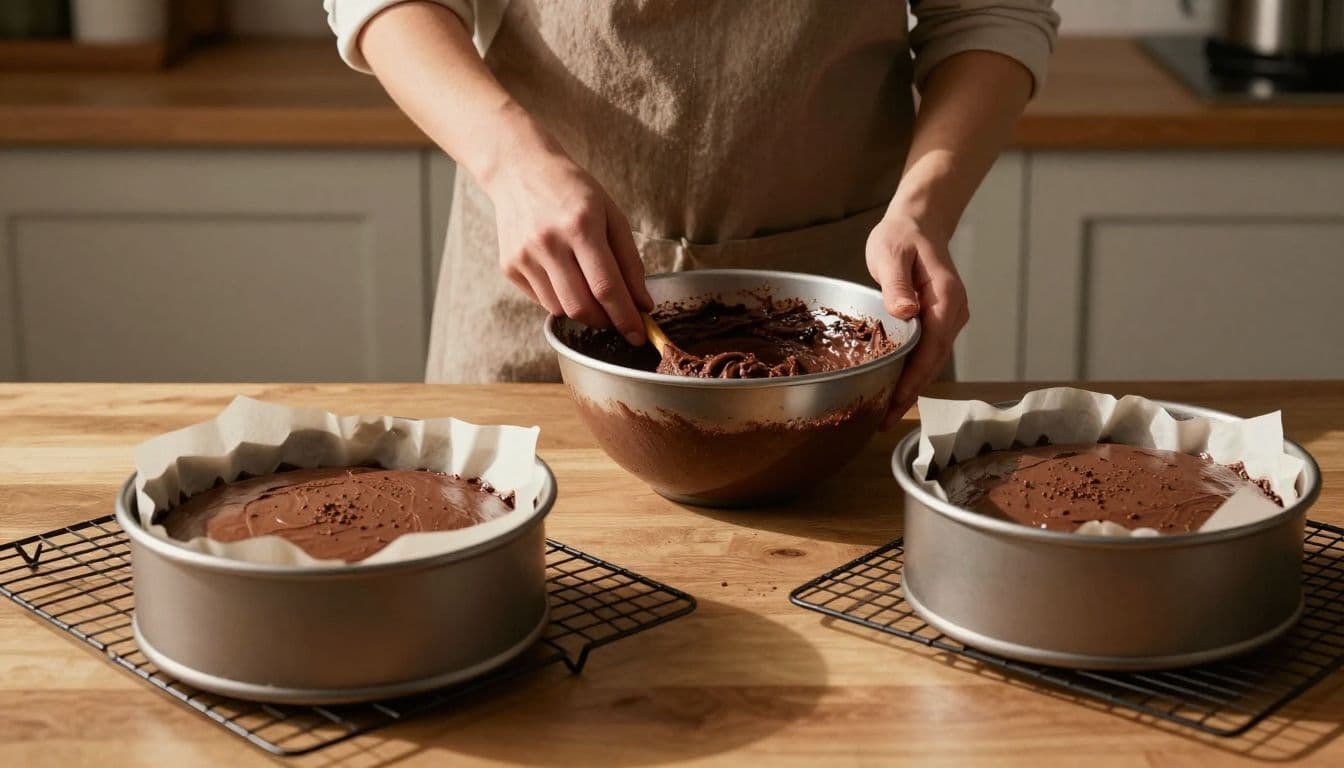
Divide the batter evenly among the prepared pans. For reliable results, place each pan on a kitchen scale, tare it, and add the same weight of batter. A large measuring cup also works well, provided you use the same number of scoops for every pan. Even portions bake at the same rate and produce layers with matching heights.
Bake at 350°F for standard round pans. Choose 325°F for thicker layers or a rich batter that needs a gentler bake, and always confirm that your oven runs accurately. The cakes are ready when a toothpick comes out with a few moist crumbs, or the centers spring back lightly when pressed. King Arthur Baking’s cake doneness guide offers helpful visual cues for this check.
Cool, Wrap, and Level the Layers Before Frosting
Let the cakes rest in their pans for about 10 minutes. Run a thin knife around the edges, then turn each layer onto a wire rack. Cool them completely before adding frosting, because warmth can melt buttercream and cause the layers to slide.
Once cool, wrap each cake tightly in plastic wrap and chill for 30 to 60 minutes. Cold layers are firmer and less likely to break during stacking. Use a serrated knife to trim away any domed tops, moving slowly with a gentle sawing motion. Save the trimmings for chocolate crumbs, cake pops, or a quick snack.
Make Chocolate Buttercream and a Smooth Ganache Finish
Chocolate buttercream gives the cake soft, creamy layers, while ganache adds a glossy finish and an extra hit of chocolate. Prepare both frostings before assembling the cake, then use each at the texture that suits the job.
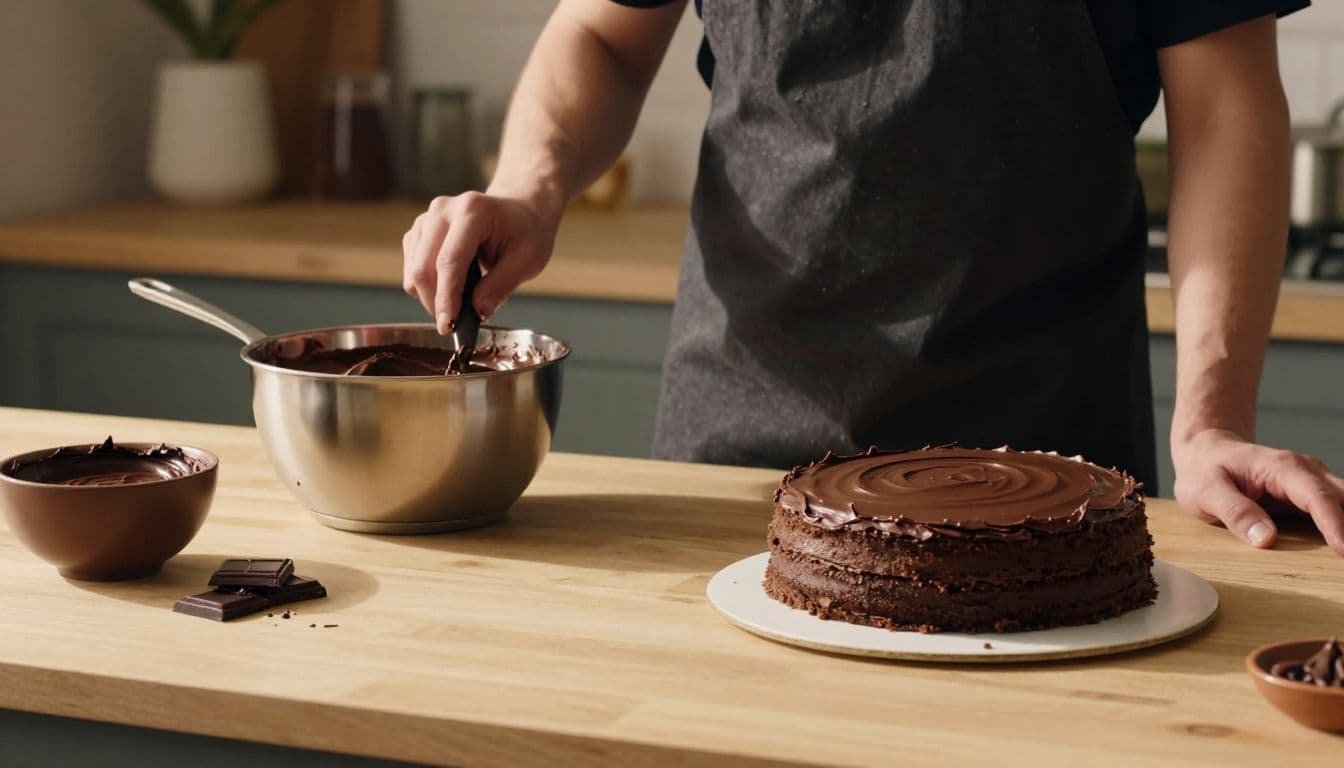
Adjust the Buttercream Until It Spreads Easily
Beat softened butter until smooth and pale. The butter should bend easily when pressed but still hold its shape. Melted butter cannot trap air well, so it produces frosting that feels greasy and lacks structure. For a smoother result, sift the cocoa and powdered sugar before adding them gradually to the bowl.
Add heavy cream, vanilla, and salt, then beat the finished frosting until light, fluffy, and completely smooth. If it feels too thick, mix in a small splash of cream. If it seems loose, add powdered sugar one tablespoon at a time until it spreads cleanly.
Check the bowl and beater before frosting the cake. Visible butter streaks or dry pockets of cocoa mean the mixture needs more beating and scraping. This chocolate buttercream recipe also highlights the importance of controlled butter temperature for a consistent texture.
Use Ganache at the Right Temperature
Place finely chopped chocolate in a heatproof bowl. Pour hot heavy cream over it, let the mixture rest for about 5 minutes, then stir from the center outward until glossy and smooth. Let the ganache cool slightly before using it as a drip. It should be warm and fluid, never hot enough to melt the buttercream beneath it.
As it cools, ganache becomes thicker and spreadable, which makes it useful between cake layers. Chill it until cold but still scoopable if you plan to whip it into a lighter frosting. Stir chilled ganache occasionally so it sets evenly rather than forming a firm outer ring around a soft center.
Whip only until the ganache becomes airy and holds soft peaks. Overwhipping can make it grainy, dense, or too firm to spread. If it becomes stiff, gently warm a small portion, stir it smooth, and mix that portion back into the bowl until the texture relaxes.
Assemble a Stable Layer Cake With Clean Chocolate Layers
Once the cake layers and frosting are ready, assembly becomes a careful stacking job. Cold layers, even filling, and a short chill keep this triple chocolate cake tall and neat.
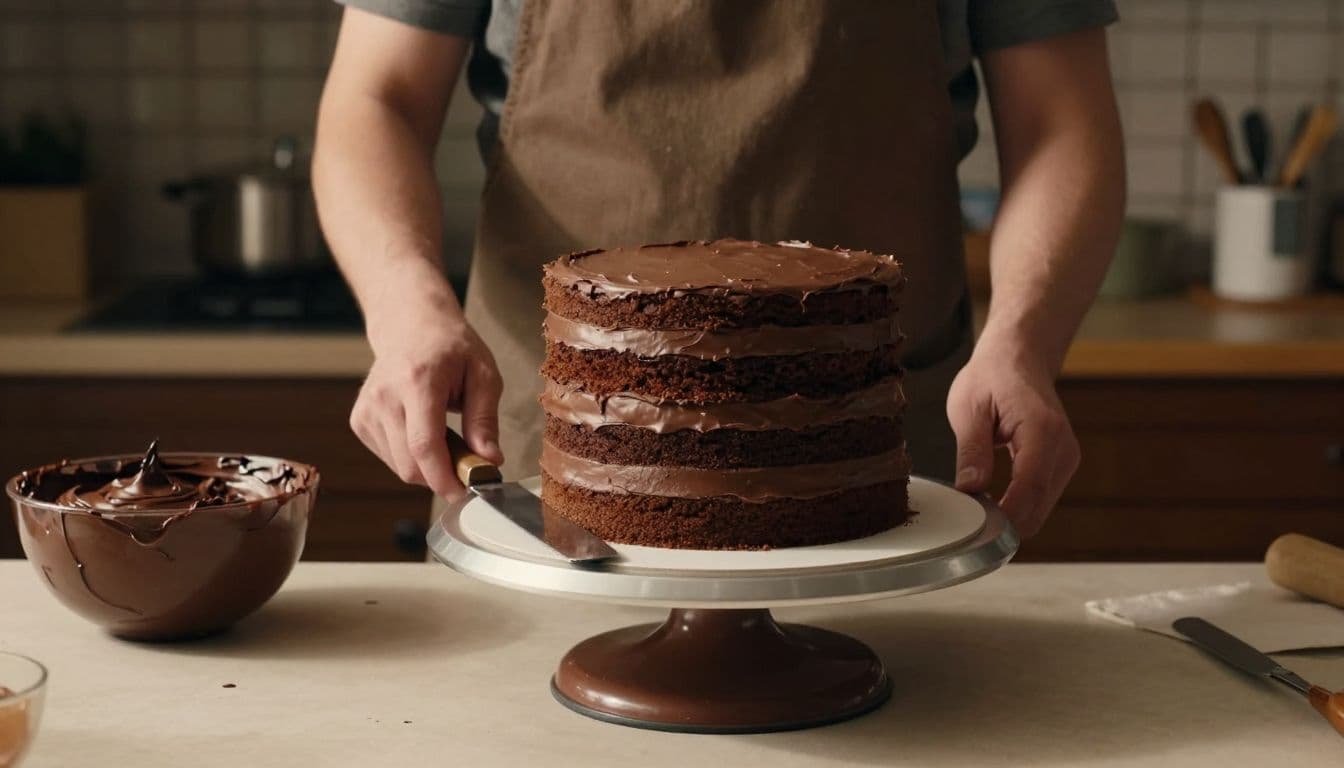
Keep the Cake Straight While You Stack It
Place the first layer, cut side down, on a cake stand. Spread about 1/2 to 2/3 cup of frosting across the top, stopping just short of the edge. Add the next layer, center it carefully, and press gently so the cake settles without crushing the crumb. Repeat with the remaining layers.
A turntable makes smoothing easier, but you don’t need one. Set the cake on a flat plate or sturdy cake stand, then rotate the plate by hand as you work. Use an offset spatula to push frosting into an even layer and smooth the sides.
Check the cake from eye level before applying the final coat. If the layers lean, gently shift them back into place while the frosting remains soft. Once the cake looks straight, add a thin crumb coat, then chill it for 15 to 30 minutes until firm. Apply the final frosting layer and chill again before adding ganache. A chilled cake helps prevent drips from running too far, as shown in this chocolate drip cake guide.
Create a Simple Bakery-Style Chocolate Decoration
Smooth the final frosting with the offset spatula, then leave a few intentional swirls around the top edge. Test one ganache drip first. If it races down the side, cool the ganache; if it barely moves, warm it briefly and stir.
After the test looks right, add drips around the cake, then spread ganache across the top. Finish with chocolate curls, chopped chocolate, chips, or reserved cake crumbs. This simple design looks festive at birthdays, family gatherings, and relaxed weekend dinners.
Quick Assembly Recipe Card
Prep: 30 minutes Chill: 30 to 60 minutes Yield: One 6-inch layer cake
Ingredients
- 3 cooled, leveled chocolate cake layers
- 1 1/2 to 2 cups chocolate buttercream
- 1/2 cup prepared chocolate ganache
- Chocolate curls or chopped chocolate, for topping
Directions
- Stack the layers with frosting between each one.
- Apply a crumb coat and chill until firm.
- Add the final frosting coat and smooth the sides.
- Test and apply the ganache drips.
- Decorate the top and chill until ready to slice.
Fix Common Problems and Store the Cake Properly
A few small adjustments can rescue a chocolate layer cake before serving. Most problems come from oven temperature, ingredient temperature, or rushing the cooling and decorating stages.
Troubleshoot Common Cake Problems
- Dry cake: Overbaking is the usual cause. Check the layers early, and remove them when a toothpick shows a few moist crumbs. Store cooled layers tightly wrapped to protect their moisture.
- Sinking centers: The batter may be underbaked, overmixed, or disturbed before the structure sets. Bake until the center springs back lightly, and avoid opening the oven door too soon.
- Cracked layers: An oven that runs hot or a pan placed too high can set the edges before the center finishes rising. Trim the domed or cracked top, then use frosting to level the layer.
- Sticking: Let the cake cool for about 10 minutes, loosen the edges, and turn it onto a rack. Parchment on the pan bottom also helps prevent torn layers.
- Runny buttercream: Warm butter or extra cream can make frosting loose. Chill it for 15 to 20 minutes, then beat it again. Add powdered sugar one tablespoon at a time if needed.
- Thick ganache: Let it sit at room temperature and stir until fluid. If it remains too firm, warm it briefly, then test one drip on the chilled cake.
- Crumbs in the frosting: Apply a thin crumb coat first, then refrigerate the cake until firm before adding the final layer. A covered cake storage guide also recommends protecting frosted cakes from drying air.
Know When the Cake Is Ready to Serve
Refrigeration helps the assembled cake set, so the layers slice with less sliding and the ganache stays neat. However, chocolate cake tastes best when it isn’t ice cold. Remove it from the refrigerator about 20 minutes before serving so the crumb and frosting can soften slightly.
For clean slices, warm a sharp knife under hot water, then wipe it dry. Cut straight through the cake, wipe the blade between cuts, and warm it again as needed. The result is a tidy view of every chocolate layer.
Keep the finished cake covered in the refrigerator for up to 5 days. For longer storage, wrap unfrosted cake layers tightly and freeze them for 2 to 3 months. When possible, freeze the layers and frosting separately, then thaw the layers in the refrigerator before assembling.
Quick Storage Recipe Card
Storage: Covered, refrigerated, up to 5 days Freezer: Wrapped layers, 2 to 3 months Serving: Rest at room temperature for 20 minutes before slicing
Triple Chocolate Layer Cake Recipe Card
This triple chocolate layer cake has tender cocoa layers, silky buttercream, and a glossy ganache drip. Use three 6-inch pans for a tall cake or divide the batter between two 8-inch pans. For pan-capacity guidance, see King Arthur Baking’s pan guide.
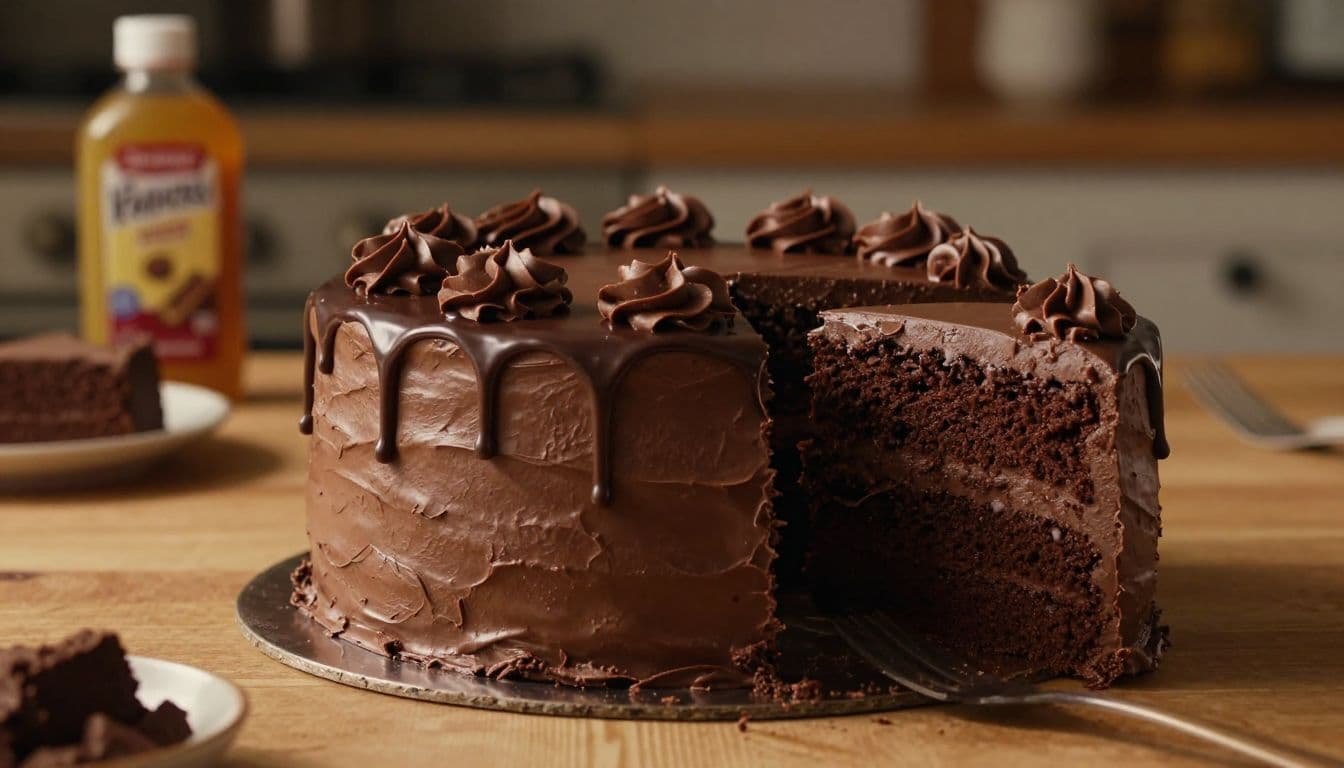
Triple Chocolate Layer Cake
Yield: One cake Serving size: 10 to 12 slices Prep time: 35 minutes Bake time: 24 to 30 minutes Cooling and chilling time: 1 hour Total time: About 2 hours and 5 minutes
Equipment
- Three 6-inch round cake pans, at least 2 inches deep
- Parchment paper
- Two mixing bowls
- Electric mixer
- Wire cooling rack
- Offset spatula
- Serrated knife
Ingredients
Chocolate cake
- 1 1/2 cups all-purpose flour
- 3/4 cup unsweetened cocoa powder
- 1 cup granulated sugar
- 1 teaspoon baking soda
- 1/2 teaspoon baking powder
- 1/2 teaspoon salt
- 2 large eggs, room temperature
- 1/2 cup neutral oil
- 3/4 cup buttermilk
- 2 teaspoons vanilla extract
- 3/4 cup hot coffee or hot water
Chocolate buttercream
- 1 cup unsalted butter, softened
- 3 cups powdered sugar
- 3/4 cup unsweetened cocoa powder
- 1/4 cup heavy cream
- 2 teaspoons vanilla extract
- 1/4 teaspoon salt
Ganache drip
- 4 ounces semisweet chocolate, finely chopped
- 1/2 cup heavy cream
Directions
- Heat the oven to 350°F. Grease the pans, line the bottoms with parchment, and dust the sides with cocoa powder.
- Whisk the flour, cocoa, sugar, baking soda, baking powder, and salt. Add the eggs, oil, buttermilk, and vanilla, then stir until nearly combined. Mix in the hot coffee until smooth.
- Divide the batter evenly among the pans. Bake for 24 to 30 minutes, until the centers spring back and a toothpick shows moist crumbs.
- Cool the cakes in their pans for 10 minutes. Transfer them to a rack, cool completely, then level the tops.
- Beat the butter until smooth. Gradually add the powdered sugar and cocoa, then beat in the cream, vanilla, and salt.
- Stack the layers with buttercream between them. Apply a crumb coat and chill for 20 minutes, then frost the cake smoothly.
- Pour hot cream over the chopped chocolate. Rest for 5 minutes, stir until glossy, and cool until fluid but no longer hot. Add the drip and chill before serving.
For two 8-inch layers, bake for about 28 to 34 minutes and begin checking early. Store the covered cake in the refrigerator for up to 5 days, or freeze wrapped cake layers for up to 3 months. Let the cake rest at room temperature for 20 minutes before slicing.
Frequently Asked Questions
A few practical questions can make the difference between a good chocolate cake and a smooth, stress-free bake. Use these answers when adapting the recipe, planning ahead, or serving guests.
Can I make this cake ahead of time?
Yes. Bake the cake layers up to two days ahead, cool them completely, wrap them tightly, and refrigerate them. You can also freeze the wrapped layers for up to three months, then thaw them in the refrigerator before decorating.
Can I use water instead of coffee?
You can replace the hot coffee with hot water in the same amount. Coffee intensifies the chocolate flavor, but it won’t make the cake taste like coffee.
How can I make this cake dairy-free?
Use plant-based butter for the frosting and unsweetened dairy-free milk mixed with a little lemon juice for the buttermilk. Prepare the ganache with dairy-free chocolate and full-fat coconut milk, then check every package for milk ingredients.
Why did my ganache drip become too thin?
The ganache was likely too warm or contained too much cream. Let it cool for several minutes, stir it well, and test one drip on the chilled cake before decorating the entire edge.
Can I use a different chocolate for the ganache?
Yes, but the chocolate type changes the texture. Dark chocolate usually creates a firmer ganache, while milk chocolate needs less cream because it contains more sugar and milk solids.
Triple Chocolate Layer Cake Quick Recipe Card
Yield: 10 to 12 slices Bake: 24 to 30 minutes at 350°F
Ingredients
- 1 1/2 cups flour
- 3/4 cup cocoa powder
- 1 cup sugar
- 1 teaspoon baking soda
- 1/2 teaspoon baking powder and salt
- 2 eggs, 1/2 cup oil, 3/4 cup buttermilk
- 2 teaspoons vanilla
- 3/4 cup hot coffee or water
- 1 batch chocolate buttercream
- 4 ounces chopped semisweet chocolate
- 1/2 cup heavy cream
Directions
- Mix the dry ingredients, then stir in the eggs, oil, buttermilk, and vanilla.
- Add the hot coffee, divide the batter among three prepared 6-inch pans, and bake.
- Cool and level the layers, then stack them with buttercream.
- Make the ganache with hot cream and chocolate. Cool slightly, add the drips, and decorate. For guidance on frosting safety, see Kansas State’s frosting safety guide.
Conclusion
A triple chocolate layer cake works because every part has a clear job. The moist cocoa layers provide a tender base, creamy chocolate frosting adds a smooth center, and the rich ganache drip creates the glossy finish that makes each slice feel special.
Chilling the cake between steps keeps the layers steady, firms the frosting, and gives you better control over the ganache. Even simple swirls, drips, or chocolate pieces can make the finished cake look polished without complicated decorating skills.
Serve this cake for a birthday, holiday gathering, family dinner, or any day that calls for extra chocolate. With a little patience during cooling and chilling, you can create a tall, beautiful dessert that tastes as good as it looks.
Triple Chocolate Layer Cake Recipe Card
Yield: 10 to 12 slices Prep time: 35 minutes Bake time: 24 to 30 minutes Total time: About 2 hours and 5 minutes
Ingredients
- 3 cooled chocolate cake layers
- 1 1/2 to 2 cups chocolate buttercream
- 4 ounces semisweet chocolate, chopped
- 1/2 cup heavy cream
- Chocolate curls or chopped chocolate, for topping
Directions
- Stack the cooled cake layers with buttercream between each one.
- Apply a crumb coat, then chill until firm.
- Add the final frosting layer and smooth the sides.
- Pour hot cream over the chopped chocolate. Rest for 5 minutes, then stir until glossy.
- Cool the ganache until fluid but not hot. Add the drips and decorate.
- Chill before serving, then let the cake rest at room temperature for about 20 minutes before slicing.
save pin for later